Looking for a Summer DIY Project? Building a Beautiful Wooden Fence in Seven Easy Steps
Looking for an easy and fun way to add some sweat equity to your home in Spruce Grove, Stony Plain, Parkland County and the Edmonton region? Building a wooden fence is a great way to add beauty and value to any home. Here’s your DIY guide to building a wooden fence for your yard in seven easy steps.
Decide What Type of Wooden Fence You Want
There are many types of wooden fences to choose from, and each requires different building methods. The best way to make your decision is to focus on what the main purpose of your fence will be. If you simply want to add some character to your property, a white picket fence might be just the ticket, but if you’re concerned about keeping out street noise or keeping a large dog in your yard, you’ll want to consider building something much taller.
Make Sure Your Fence Complies With Local Bylaws
Before you start building your fence, it’s important to ensure that your fence complies with local government regulations. If you build a fence that’s declared illegal by the local government, your fence could be torn down. Many municipalities require that you apply for a permit before building anything along your property line. It’s also important to check with the local authorities to make sure you won’t be coming into contact with any water, gas, or electrical lines when you dig your post holes.
Find the Right Materials
Your choice of fence style should help you determine which materials you’ll want to use. Be sure to pick something strong as well as stylish, as you’ll want to ensure that your fence is able to stand up to just about anything Mother Nature can throw at it.
Find and Mark Your Corners and Support Posts
When it comes time to build your fence, the first thing to do is mark where your corner and middle posts will be. Stake your corners and use a square level to make sure your corners are 90 degrees. Then tie strings between your stakes and measure out where your support posts will be. Generally you’ll want your support posts to be 8 inches or less apart. Measure so that you have an equal distance between each support post and each corner post if possible.
Dig Your Post Holes and Secure Your Posts
Once you’ve got your post positions marked you can start digging. You’ll want to bury at least one third of the length of each post underground, so you’ll need some fairly deep holes. Use instant concrete to hold your posts in place, and cover the remainder of the hole with dirt once the concrete has dried.
Build Your Fence Frame
Now you can attach horizontal support rails to your fence between each post. These are typically constructed using 2x4s. Depending on the size of your fence, you’ll probably want at least two or three support rails per section.
Add and Treat Your Privacy Boards
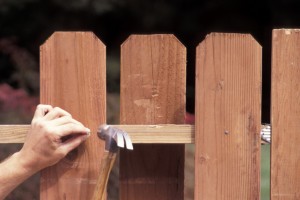
The final step is to add your vertical wooden strips or “privacy boards.” These boards are what will give your fence its final look. Choose a style that suits your property and pick a colour or stain that you think will complement the look of the fence.
There you have it! A brand new fence in seven simple steps. Of course you’ll want to do some careful measuring and planning before getting too carried away, and you might want to talk to a builder or property expert if you’ve never built a fence before.
If you’re wondering about what type of fence would best enhance the value of your property, or if you’d like to know anything else about Spruce Grove real estate, Stony Plain real estate, Parkland County real estate, Edmonton real estate, Parkland County acreages, or Edmonton acreages, I’d be happy to answer any questions you might have. Call or text me at 780-910-9669, email me at barry@barryt.ca, or contact me here.
Tags: Do It Yourself, home improvement


