Archive for the ‘Backyard’ Category

Customizing Your Outdoor Space

Monday, October 15th, 2018

In our short summer season, I like to spend as much time outdoors as I can.  Create your own back yard oasis and start absorbing the vitamin D.  Here’s how:

Declutter & Clean
The first step to sprucing up the outdoor living room is to clear dirt and clutter from the space. Store lawn equipment, children’s toys, and pet play things in a shed or garage. Give the entire area a good scrub down, sweeping away dust and debris to create a fresh, clean canvas.

Invite the Outdoors In
Blending interior and outdoor living spaces helps the exterior area feel like an extension of the home, not an afterthought. Ensure blinds and curtains are open to the family yard, highlighting the outdoor oasis.  Make certain the indoor and outdoor décor complement one another and utilize similar colors, materials and styles both inside and out.

Create Cozy Sitting Areas
Create easy traffic flow throughout the outdoor living room, while offering a number of places for people to sit – at a table, around a fire pit, or in a cozy chair configuration. Also, offer some shade by using umbrellas or outdoor curtains to minimize sun glare and maximize visions of enjoyment in the outdoor living room.

Soften the Outdoor Space

Introduce a few soft design features into the outdoor area to create an inviting atmosphere. Rugs, throw pillows and upholstered patio furniture are a few ways to accomplish a “cozy” feel. Ensure these items are looking fresh and clean and not worn and dated. It’s relatively inexpensive to swap out new pillows and rugs. Create outdoor ambiance by hanging string lighting, introducing a fire pit in the center of a patio, setting up a zen-like water feature, or adding candles, small plants and freshly-cut flowers to tabletops.

Utilize Living Landscapes
Nothing says “welcome home” quite like a beautiful living landscape, complete with flowering shrubs, trees, flowers, and other vegetation. Freshen up the family yard by weeding, mulching and planting flower beds and pots with colorful flowers and verdant plants. Vases of flowers can also help bring life – and a pop of color – to outdoor tablescapes.

Getting Your Yard Ready For Winter

Friday, September 28th, 2018

Brrr, the big chill is soon upon us.  Time to get your yard ready for hibernation.  Here are 5 things to do to prepare your yard for the snow:

·        Mow and water the lawn, grasscycle

Water – grass may be growing more slowly, but it is putting energy into building the root system and still needs regular waterings

Mow – continue to mow so that water and sunlight can reach the plant

Grasscycle – leave grass clippings on the lawn to help your lawn become stronger and healthier

·        Fill in bald spots, control the weeds and fertilize

Fill in bare spots now with a grass patch repair kit, fertilize with some weed and feed to kill the weeds and give much needed nutrients to the grass over the winter.

·        Prune, mulch and transplant perennials

Prune back perennials to protect their extremities from extreme weather.  Place mulch around the roots to help insulate them.  If you need to transplant, do it now to give the root systems time to develop before the ground freezes.

·        Clean up annuals

Once your annuals stop producing leaves or flowers, they can be pulled from your garden and flower beds.  Plants are easier to pull out before the long winter has wilted them, plus it will make your yard look much neater.

·        Rake the fallen leaves

Leaves left on the grass during snow can suffocate it in the spring when snow melts.  They can also cause mold and fungal infections in your yard.  Rake them up as soon as they fall and compost them or dispose of them with your other yard waste.

 By doing this every fall, you can look forward to a gorgeous yard and less work in the spring.  Now go and enjoy a pumpkin spice latte, you deserve it!

Spring Cleaning

Thursday, April 6th, 2017

Tulips and daffodils are making themselves known, popping up out of the dirt, a sure sign that spring is here. It’s time to get your house looking and feeling clean, inside and out. Here is a checklist of things that need doing:

Outside:
• Put seasonal items away in storage (snow shovels, Christmas decorations, etc.)
• Pick up stray garbage
• Clean up after your pet
• Shake out entry mat
• Sweep the walks and deck/patio
• Rake the grass when it is dry
• Turn on hose bibs when the chance of freezing is over
• Put out hoses
• Power wash siding
• Wash windows and doors
• Clean outdoor light fixtures
• Clean outdoor furniture
• Trim trees, bushes, shrubs
• Prepare garden and flower beds for planting

Inside:
• Start at the top and work your way down
• Clean ceiling fans and light fixtures
• Dust ceiling corners
• Wash or dust walls and baseboards
• Clean air vents
• Wash windows
• Wipe all light switches and electrical plug covers and door knobs
• Dust all surfaces
• Clean all window coverings
• Polish furniture
• Clean floors
• Pull out appliances and clean underneath them

Winterizing Hose Bibs

Monday, December 5th, 2016

Here is the step by step directions for winterizing your hose bib correctly, to ensure no breakage or bursting when spring rolls around.
Step One: Take Off The Hose
You can’t winterize the hose bib with the hose attached to it still. No brainer right? Detach the hose from the hose bib and drain it completely. Frozen water in hoses can cause holes and leaks too, so to keep your hose over winter it needs to be properly drained. You can lay the hose down and walk the length of it, picking up small sections and letting the water flow out. Imagine a tube of toothpaste, and try not to miss any spots. Once it’s empty, roll it up and store it for the winter months.
Step Two: Drain the Faucet
This step is quite like the steps you take to winterize faucets in your home. You’ll locate the shut off valve for the outside water line (if you have any trouble here contact a plumber to help you locate it) and shut the water off. Once the water is disconnected go back outside and turn the faucet all the way on. This will drain out any water currently sitting in the line.
Step Three: Drain the Valve
Go back inside to where the shut off was, and locate a small brass looking plug or cap. Unplug that cap, so that the valve itself will drain. Draining the water out, without emptying the valve, is useless. You must do both. Once that valve and all the water in the line have been drained, you can close the valve and shut the hose bib faucet off.
You’re Done!
It’s a simple 10 minute job, but it can save you hundreds in plumbing repairs when spring thaws the frozen winter water.

Looking for a Summer DIY Project? Building a Beautiful Wooden Fence in Seven Easy Steps

Monday, June 16th, 2014

Looking for a Summer DIY Project_ Building a Beautiful Wooden Fence in Seven Easy Steps | Spruce Grove Stony Plain Parkland County Real Estate | Barry Twynam


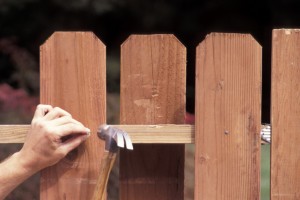
Looking for an easy and fun way to add some sweat equity to your home in Spruce Grove, Stony Plain, Parkland County and the Edmonton region? Building a wooden fence is a great way to add beauty and value to any home. Here’s your DIY guide to building a wooden fence for your yard in seven easy steps.

Decide What Type of Wooden Fence You Want

There are many types of wooden fences to choose from, and each requires different building methods. The best way to make your decision is to focus on what the main purpose of your fence will be. If you simply want to add some character to your property, a white picket fence might be just the ticket, but if you’re concerned about keeping out street noise or keeping a large dog in your yard, you’ll want to consider building something much taller.

Make Sure Your Fence Complies With Local Bylaws

Before you start building your fence, it’s important to ensure that your fence complies with local government regulations. If you build a fence that’s declared illegal by the local government, your fence could be torn down. Many municipalities require that you apply for a permit before building anything along your property line. It’s also important to check with the local authorities to make sure you won’t be coming into contact with any water, gas, or electrical lines when you dig your post holes.

Find the Right Materials

Your choice of fence style should help you determine which materials you’ll want to use. Be sure to pick something strong as well as stylish, as you’ll want to ensure that your fence is able to stand up to just about anything Mother Nature can throw at it.

Find and Mark Your Corners and Support Posts

When it comes time to build your fence, the first thing to do is mark where your corner and middle posts will be. Stake your corners and use a square level to make sure your corners are 90 degrees. Then tie strings between your stakes and measure out where your support posts will be. Generally you’ll want your support posts to be 8 inches or less apart. Measure so that you have an equal distance between each support post and each corner post if possible.

Dig Your Post Holes and Secure Your Posts

Once you’ve got your post positions marked you can start digging. You’ll want to bury at least one third of the length of each post underground, so you’ll need some fairly deep holes. Use instant concrete to hold your posts in place, and cover the remainder of the hole with dirt once the concrete has dried.

Build Your Fence Frame

Now you can attach horizontal support rails to your fence between each post. These are typically constructed using 2x4s. Depending on the size of your fence, you’ll probably want at least two or three support rails per section.

Add and Treat Your Privacy Boards

The final step is to add your vertical wooden strips or “privacy boards.” These boards are what will give your fence its final look. Choose a style that suits your property and pick a colour or stain that you think will complement the look of the fence.

There you have it! A brand new fence in seven simple steps. Of course you’ll want to do some careful measuring and planning before getting too carried away, and you might want to talk to a builder or property expert if you’ve never built a fence before.

If you’re wondering about what type of fence would best enhance the value of your property, or if you’d like to know anything else about Spruce Grove real estate, Stony Plain real estate, Parkland County real estate, Edmonton real estate, Parkland County acreages, or Edmonton acreages, I’d be happy to answer any questions you might have. Call or text me at 780-910-9669, email me at barry@barryt.ca, or contact me here.

Splendor in the Grass?! Nope, You’ve Got Snow Mold!

Friday, April 25th, 2014
Splendor in the Grass?!  Nope, You’ve Got Snow Mold!  | Spruce Grove Stony Plain Parkland County Real Estate | Barry Twynam

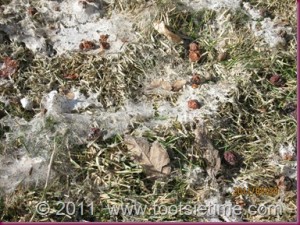
(Photo courtesy of TootsieTime.com)

After another brutal winter in the Spruce Grove, Stony Plain, Parkland County and Edmonton area, you can finally look out your windows and see grass instead of mounds of snow.  But what is that dull fuzzy coating in circles on your lawn?  And how did it get there?  You, my friend, have been afflicted by the dreaded “snow mold”!

What is snow mold?

Snow mold is a fungus that shows up in the early spring as snow melts.  According to Lawncare.about.com, there are two types of snow mold.  Pink snow mold (or Fusarium patch) grows in a pinkish web-like mycelium on the surface of the grass.  When the grass is wet, the mycelium resembles white cobwebs, but as it matures it changes to a pink or salmon color.  The mycelium disappears as the grass dries.  Gray snow mold (Typhula blight) has a mycelium that stays a whitish-gray color.  If you look closely at the grass blades infected by gray snow mold, you may see tiny black mycelial masses (sclerotia).  Plants infected with pink snow mold will not have these, but pink snow mold is actually more damaging than the gray variety because it can destroy the roots and crowns of grass.  And, just to keep things interesting, it’s possible for your lawn to be infected with both!

What causes snow mold?

Many of us think of mold as an organism that flourishes in warm, damp places.  While other fungi live it up during the warm summer months, snow mold is dormant, only coming out to play when the weather is cold and wet. Snow mold especially loves long periods of snow cover on ground that is not completely frozen.  Sounds a lot like spring in our region, doesn’t it?  Snow mold also shows up in yards that were neglected in the fall:  grass left unmowed and leaves not raked before the first snowfall.

How do I stop it?

Prevention:

  • Change your lawn fertilizer at the end of summer to one with much less nitrogen.  This will slow down lawn growth.
  • Continue to mow your lawn until growth stops.  This will leave a short turf that won’t fall over on itself during the winter, giving snow mold less chance of taking hold.
  • Remove any dead leaves from your lawn so that nothing is covering the grass.

Repair:

If snow mold is sitting on your lawn right now, don’t panic.  Most snow mold damage will repair itself as the area dries and the grass grows out in the warm spring weather.  If you are bothered by the ugly look of snow mold in your yard or an allergic reaction to breathing in the spores, you may want to help things along by lightly raking the grass as it dries.  Reduce any piles of snow that still remain in shaded areas.  Overseed bare patches if necessary, and then allow the natural growth process to fill out your lawn.  For more detailed instructions on dealing with snow mold infested grass in the spring, check out “Snow Mold: Causes and Prevention”, an article from Babes Lawn Care.com.

Looking to buy a property with a great lawn or sell your well-tended garden property this spring?  Let’s talk!  Call or text me at 780-910-9669, email me at barry@barryt.ca, or contact me here.

Plan Ahead for Spring With the Lazy Person’s Guide to Building Your Own Deck

Wednesday, March 12th, 2014

Plan Ahead for Spring With the Lazy Person's Guide to Building Your Own Deck | Spruce Grove Stony Plain Parkland County Real Estate | Barry TwynamSo, you’ve just moved into your new home in Spruce Grove, Stony Plain, Parkland County or the Edmonton region and you’ve decided the best way to enjoy all of that lush scenery is to build a new deck. In fact, you’ve decided to build the deck yourself. This might seem like a lot of hard work at first, but building your own deck can be a pretty simple job with the right plan of action.

Pick a Design

The amount of work you’ll need to do all depends on the style of deck you want. If you’re strapped for ideas or you’re having trouble trying to visualize your dream deck, try using the deck plans simulator at deckplans.com. Once you’ve settled on a design, you’ll need to figure out what size the deck will be. If your deck is free standing, you’ll have complete flexibility when it comes to the shape and size. If you plan on building a deck that sits against your house, you’ll have to be aware of wall lengths, shrubbery, and other obstacles the might limit the space available for the deck.

Order Your Materials

The best part about using a deck plans simulator is that most will assemble a materials list for you, but be sure to order extra parts just in case. Here’s a brief overview of those materials:

– 2×6 planks treated lumber

– 4×4 or 4×6 treated lumber

– deck screws

– joist hangers

– block piers or concrete and pier tubes

– J bolts or anchor bolts

– mason’s string

– carriage bolts

You’ll also need to pick up a few tools:

– water level

– measuring tape

– circular saw

– sand paper

– hammer

– shovel

– safety clothing (goggles, gloves, etc.)

– hammer drill (you might not need this depending on what bolt system you use for the posts)

Building a Deck: The Basics

Step 1: Lay out the frame for the deck with string and put down markers for where the support posts will go.

Step 2: Dig holes for the concrete piers. Keep in mind the desired height of your deck.

Step 3: Pour your concrete for the piers if you’re making your own, and place the J-bolts in the centre of each. Leave them to dry. If you’re using block piers, place the blocks and prep each for an anchor bolt with the hammer drill.

Step 4: Place the piers. Use a level throughout the process to make you don’t end up with a wonky deck.  Secure your posts to the piers and make sure they sit at the right height.

Step 5: Use carriage bolts and lumber to build the border. Place joists along the flat side of the lumber to secure the support planks that run underneath the floor planks.

Step 6: Lay down the floorboards by hammering them into the support planks.

Step 7: Use sand paper to smooth down any chips or split wood. You’ll also need to go over any areas you sand down with a deck sealant for waterproofing.

Building your own deck doesn’t have to be hard. A basic deck can be built in as little time as a few afternoons. A deck can be a beautiful addition that raises the value of Spruce Grove real estate, Stony Plain real estate, Parkland County real estate, or Edmonton real estate. Homes in Parkland County acreages and Edmonton acreages offer a spectacular view, so why not enjoy it on your very own deck?

P.S.  Before you do any of the above, check with the local municipality about whether you’ll need a building permit for your deck!

Have questions about owning a home in these areas? Call or text me at 780-910-9669, email me at barry@barryt.ca, or contact me here.

Spring Decor Ideas

Tuesday, June 18th, 2013

If you’re looking for free and current decorating ideas applicable to Spruce Grove, Stony Plain, Parkland County and the Edmonton area, look no further than the Edmonton Journal’s Homes & Design magazine.  The Summer 2013 issue is now available at edmontonjournal.com/homesdesign.  Some of the topics in this issue:

  • Spruce up your patio with the latest decor ideas, including some 60s Mad Men inspired looks
  • Learn all about “cottage style”
  • Furniture in bright colors is back.  Learn how to integrate this look into your home
  • Grow your own food this summer with gardening tips that anybody can follow
  • Quartz or granite?  Replace your counter tops with the finish that’s best for you

If you like what you see in this online magazine, sign up to be notified when the next issue is posted, and happy decorating!


Barry Twynam, Century 21 Leading
#1 14 McLeod Avenue, Spruce Grove, Alberta, T7X 3X3
Tel: 780-910-9669 Cell: 780-910-9669 Fax: 780-962-9699
© Copyright 2011, Real Estate Websites by Redman Technologies Inc. | Privacy Policy | Sitemap
The data included on this website is deemed to be reliable, but is not guaranteed to be accurate by the REALTORS® Association of Edmonton
MLS® MLS REALTOR® Realtor
Trademarks used under license from CREA