Archive for the ‘Home Improvement’ Category

Five Tips to Keep in Mind when Replacing the Windows on Your Edmonton-Area House or Condo

Friday, July 25th, 2014

Five Tips to Keep in Mind When Replacing the Windows | Spruce Grove Stony Plain Parkland County Real Estate | Barry TwynamAfter the purchase of a house in Spruce Grove, Parkland County, Stony Plain and the entire Edmonton region, there could be, for one reason or the other, the need to replace its windows. It is always advisable to keep in mind the tips below when replacing windows.

Decide Whether Or Not the Process Will Be Done By a Professional

The success of any window replacement project depends on the type of window chosen and the quality of workmanship used during the replacement. A buyer can use metallic or wooden windows for replacement. Using a reputable installation company gives the owner an assurance of getting quality services. It is advisable to use a company that offers a warranty on parts and labour in addition to the products themselves. If you as a homeowner plan to replace the window yourself, be absolutely sure that you’re capable of the task before attempting it.

Consider the Amount of Time That The New Windows Should Serve

Where a replacement is meant to increase the house value during resale, the priorities may be different than for those who simply want to fix cracked or chipped glass. Energy saving, ease of maintenance and beauty are the most common upgrade considerations. With vinyl windows, homeowners can get back about 71 percent of their investment. Where this replacement is for the owner’s benefit, it’s important to consider warranties and repairs, quality and durability, design and appearance, ordering and installation, price, and energy efficiency. In short: the price of the window itself isn’t the total cost.

Narrow Your Options on Warranties

Whether the warranty covers broken seals and air leaks, or labour and glass breakage, it is advisable to determine how long this coverage will last. Get these warranties from a reputable company and determine the course of action should this company go out of business. The company has to carry liability insurance and must be licensed to work within the locality of the house. Most importantly, ascertain whether or not these warranties are transferable to the next homeowner.

Carry Out Proper Prior Preparation

It is important to prepare before the replacement process begins. Apart from being sure of the cost, it’s advisable that homeowners remove blinds and curtains from these windows. They should also alert their alarm company and create enough working space around the windows to ensure that the process is done efficiently and fast.

Try To Make the Entire Process Fun

The project will only be fun if the result will bring comfort, a sense of security and beauty. Decisions about the price and energy efficiency should be made with everyone’s comfort in mind.

These tips will also be applicable to anyone with Parkland County acreages, as well as Edmonton acreages. Several years after construction, there may be a need to replace windows; hopefully, the above tips are useful.

Comments or questions are always welcome.  Call or text me at 780-910-9669, email me at barry@barryt.ca, or contact me here.


Three Home Automation Technologies That Will Increase the Resale Value of Your Edmonton Area House

Friday, June 20th, 2014

Three Home Automation Technologies That Will Increase the Resale Value of Your Edmonton Area House | Spruce Grove Stony Plain Parkland County Real Estate | Barry TwynamIf you’re in the process of listing your Spruce Grove real estate, Parkland County real estate, Stony Plain real estate or other Edmonton real estate for sale, it is important to make property improvements that buyers are looking for and that will increase resale value. There is nothing worse than making a home modification or a property upgrade that will not offer you any return on your investment in the form of a larger offer. Some of the more popular upgrades to consider when you want a return involve modern home automation. Here are three home automation technologies that will bring your home into the 21st century while attracting buyers.

Appeal to a Buyer’s Desire for Safety with a Home Automation Security System

Home buyers who are looking to buy highly valued Parkland County acreages or other Edmonton acreages want to know that they will be safe and secure on their property. When you are selling a property, it is all about appealing to the buyer’s emotions, and all buyers want comfort and safety. The first home automation system all sellers should consider installing in their home is a security system. With the right home automation monitoring equipment, including alarms and security cameras, you can give all buyers setting foot on the property a feeling of relief as you show them how you can control, arm, disarm and view the property from a remote device installed with the home automation app.

More Dramatic and Efficient Lighting Systems

Selling your home or your acreage is all about making that first impression. Not only does your property need curb appeal, it needs to appeal to the growing market of energy efficient buyers that exists today. Home automation lighting systems are becoming the new craze, and these systems will offer you a return in two very different ways. The dramatic lighting dimming effects that you can dress your home with will set a mood to capture attention, and the energy efficient qualities of the system will reinforce just how great the home automation technology is.

Decluttering The Property With Whole Home Entertainment

More and more households are ditching the wires and the clutter of electronics and remote controls that once lined cabinets and cluttered tabletops. Cables have become eyesores and speakers needed in every room have become an unnecessary expense. If you are targeting a tech-savvy buyer who wants a whole-home automation entertainment system that allows them to ditch the wires and all of those remotes, this is a technology to add to your home. The speakers will be hidden in your ceiling, screens will be cleverly mounted, and buyers will pay attention to your tech-savvy listing.

Every seller wants to set a sales record and get the best offer on their home. To make this happen, you need to choose to invest in upgrades and updates that will bring your dated property into the 21st century while still ensuring it has character.

If you need help deciding which updates are best, I am always willing to help answer any home-related questions that you might have.  Call or text me at 780-910-9669, email me at barry@barryt.ca, or contact me here.

Looking for a Summer DIY Project? Building a Beautiful Wooden Fence in Seven Easy Steps

Monday, June 16th, 2014

Looking for a Summer DIY Project_ Building a Beautiful Wooden Fence in Seven Easy Steps | Spruce Grove Stony Plain Parkland County Real Estate | Barry Twynam


Looking for an easy and fun way to add some sweat equity to your home in Spruce Grove, Stony Plain, Parkland County and the Edmonton region? Building a wooden fence is a great way to add beauty and value to any home. Here’s your DIY guide to building a wooden fence for your yard in seven easy steps.

Decide What Type of Wooden Fence You Want

There are many types of wooden fences to choose from, and each requires different building methods. The best way to make your decision is to focus on what the main purpose of your fence will be. If you simply want to add some character to your property, a white picket fence might be just the ticket, but if you’re concerned about keeping out street noise or keeping a large dog in your yard, you’ll want to consider building something much taller.

Make Sure Your Fence Complies With Local Bylaws

Before you start building your fence, it’s important to ensure that your fence complies with local government regulations. If you build a fence that’s declared illegal by the local government, your fence could be torn down. Many municipalities require that you apply for a permit before building anything along your property line. It’s also important to check with the local authorities to make sure you won’t be coming into contact with any water, gas, or electrical lines when you dig your post holes.

Find the Right Materials

Your choice of fence style should help you determine which materials you’ll want to use. Be sure to pick something strong as well as stylish, as you’ll want to ensure that your fence is able to stand up to just about anything Mother Nature can throw at it.

Find and Mark Your Corners and Support Posts

When it comes time to build your fence, the first thing to do is mark where your corner and middle posts will be. Stake your corners and use a square level to make sure your corners are 90 degrees. Then tie strings between your stakes and measure out where your support posts will be. Generally you’ll want your support posts to be 8 inches or less apart. Measure so that you have an equal distance between each support post and each corner post if possible.

Dig Your Post Holes and Secure Your Posts

Once you’ve got your post positions marked you can start digging. You’ll want to bury at least one third of the length of each post underground, so you’ll need some fairly deep holes. Use instant concrete to hold your posts in place, and cover the remainder of the hole with dirt once the concrete has dried.

Build Your Fence Frame

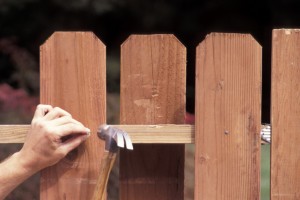
Now you can attach horizontal support rails to your fence between each post. These are typically constructed using 2x4s. Depending on the size of your fence, you’ll probably want at least two or three support rails per section.

Add and Treat Your Privacy Boards

The final step is to add your vertical wooden strips or “privacy boards.” These boards are what will give your fence its final look. Choose a style that suits your property and pick a colour or stain that you think will complement the look of the fence.

There you have it! A brand new fence in seven simple steps. Of course you’ll want to do some careful measuring and planning before getting too carried away, and you might want to talk to a builder or property expert if you’ve never built a fence before.

If you’re wondering about what type of fence would best enhance the value of your property, or if you’d like to know anything else about Spruce Grove real estate, Stony Plain real estate, Parkland County real estate, Edmonton real estate, Parkland County acreages, or Edmonton acreages, I’d be happy to answer any questions you might have. Call or text me at 780-910-9669, email me at barry@barryt.ca, or contact me here.

Plan Ahead for Spring With the Lazy Person’s Guide to Building Your Own Deck

Wednesday, March 12th, 2014

Plan Ahead for Spring With the Lazy Person's Guide to Building Your Own Deck | Spruce Grove Stony Plain Parkland County Real Estate | Barry TwynamSo, you’ve just moved into your new home in Spruce Grove, Stony Plain, Parkland County or the Edmonton region and you’ve decided the best way to enjoy all of that lush scenery is to build a new deck. In fact, you’ve decided to build the deck yourself. This might seem like a lot of hard work at first, but building your own deck can be a pretty simple job with the right plan of action.

Pick a Design

The amount of work you’ll need to do all depends on the style of deck you want. If you’re strapped for ideas or you’re having trouble trying to visualize your dream deck, try using the deck plans simulator at deckplans.com. Once you’ve settled on a design, you’ll need to figure out what size the deck will be. If your deck is free standing, you’ll have complete flexibility when it comes to the shape and size. If you plan on building a deck that sits against your house, you’ll have to be aware of wall lengths, shrubbery, and other obstacles the might limit the space available for the deck.

Order Your Materials

The best part about using a deck plans simulator is that most will assemble a materials list for you, but be sure to order extra parts just in case. Here’s a brief overview of those materials:

– 2×6 planks treated lumber

– 4×4 or 4×6 treated lumber

– deck screws

– joist hangers

– block piers or concrete and pier tubes

– J bolts or anchor bolts

– mason’s string

– carriage bolts

You’ll also need to pick up a few tools:

– water level

– measuring tape

– circular saw

– sand paper

– hammer

– shovel

– safety clothing (goggles, gloves, etc.)

– hammer drill (you might not need this depending on what bolt system you use for the posts)

Building a Deck: The Basics

Step 1: Lay out the frame for the deck with string and put down markers for where the support posts will go.

Step 2: Dig holes for the concrete piers. Keep in mind the desired height of your deck.

Step 3: Pour your concrete for the piers if you’re making your own, and place the J-bolts in the centre of each. Leave them to dry. If you’re using block piers, place the blocks and prep each for an anchor bolt with the hammer drill.

Step 4: Place the piers. Use a level throughout the process to make you don’t end up with a wonky deck.  Secure your posts to the piers and make sure they sit at the right height.

Step 5: Use carriage bolts and lumber to build the border. Place joists along the flat side of the lumber to secure the support planks that run underneath the floor planks.

Step 6: Lay down the floorboards by hammering them into the support planks.

Step 7: Use sand paper to smooth down any chips or split wood. You’ll also need to go over any areas you sand down with a deck sealant for waterproofing.

Building your own deck doesn’t have to be hard. A basic deck can be built in as little time as a few afternoons. A deck can be a beautiful addition that raises the value of Spruce Grove real estate, Stony Plain real estate, Parkland County real estate, or Edmonton real estate. Homes in Parkland County acreages and Edmonton acreages offer a spectacular view, so why not enjoy it on your very own deck?

P.S.  Before you do any of the above, check with the local municipality about whether you’ll need a building permit for your deck!

Have questions about owning a home in these areas? Call or text me at 780-910-9669, email me at barry@barryt.ca, or contact me here.

5 Easy Ways to Cut Your Heating Bill This Winter

Friday, February 21st, 2014

5 Easy Ways to Cut Your Heating Bill This Winter | Spruce Grove Stony Plain Parkland County Real Estate | Barry TwynamWhen it comes to the winter season in Alberta, some definite certainties are snow, ice, and freezing cold temperatures. But just because it’s cold outside doesn’t mean it has to be cold inside. While the elements can make it more challenging to keep warm in a cost-effective way, there are things that homeowners in the Spruce Grove, Stony Plain, Parkland County and the Edmonton region can do to lessen the amount they pay to heat their homes. Here’s a list of five easy ways for homeowners to cut their heating bills this winter.

Install a Programmable Thermostat

Homeowners with Spruce Grove real estate or Stony Plain real estate—or consumers interested in the region—can help to lessen their home heating bills by heading over to their nearest home improvement store and picking up programmable thermostats. Once the thermostat is installed, homeowners will be able to program the units to bring the temperature down a few notches when their homes are unoccupied or when people are sleeping. By keeping things nice and toasty only when homes are occupied, homeowners can take a little bit of the sting out of their next home heating bill.

Get a Furnace Tune-up

An annual furnace tune-up performed by a certified professional will keep furnaces working optimally. When furnaces are working properly and efficiently, the end result will be savings on the home heating front for homeowners with Parkland County real estate. Routine maintenance will also lower the odds of system failure at the worst possible time.

Remember Furnace Filter Maintenance

Homeowners with Edmonton acreages should, in addition to having their furnaces professionally serviced, be sure to either replace or clean their furnace filters as per the frequency recommended in manuals that came with their units. Failing to do this will compromise the efficiency of the equipment and lead to higher heating bills. Some filters can be cleaned and reused while others need to be thrown out and replaced. It’s up to homeowners to determine which type they have.

Insulate Against the Cold

Improperly insulated homes will cost more to keep warm, since furnaces will have to work harder to compensate. Whether independently or with the help of contractors, homeowners with Edmonton real estate should insulate any areas requiring insulation. Key areas where heat can escape homes include attics, walls, and crawl spaces. Once their homes have been properly insulated, homeowners will find not only that their residences are cozier, but also that their heating bills are lower than usual.

Seal the Leaks

Homeowners with Parkland County acreages would probably be surprised to learn how much cold air can enter their residences through cracks and gaps. Fortunately, they can pick up some sealant solutions sold at home improvement stores to seal out the cold air. Areas to watch out for include doorways, window frames, and duct work.

Just because it’s cold outside doesn’t mean that homeowners have to settle for chilly climates inside their homes. Following the aforementioned tips will help to keep homes warm and reduce heating bills.

I am always willing to answer any home-related questions you might have! Call or text me at 780-910-9669, email me at barry@barryt.ca, or contact me here.

6 Steps to a Successful Reno

Wednesday, January 15th, 2014

6 Steps to a Successful Reno | Spruce Grove Stony Plain Parkland County Real Estate | Barry TwynamThe brutal winter we’ve been experiencing in Spruce Grove, Stony Plain, Parkland County, the Edmonton region and elsewhere in Canada has us pining for spring.  That may lead to thoughts of sprucing up our homes either to improve our living situation or to get our property ready to sell.

Whether your remodeling project is big or small, whether you do it yourself or hire out the work, every reno project has certain phases that must be completed in detail to ensure the job is done right.  We’ve all heard the stories about disastrous renovation projects.  Chances are good those projects failed because some vital step was missed or skipped over.

Step One:  Get Inspired

You may have been dreaming about the final result of your project for a while.  Now is the time to get those ideas out of your head and into a more concrete form.  Jot down a general outline of what the finished product will be.  Gather photos (or swatches, paint chips, etc.) from everywhere – magazines, advertising flyers and brochures, the Internet, your own photos from store displays or homes you’ve visited – that represent what you have in mind.  Pinterest is a great tool for collecting and organizing items you’ve found online.

Step Two:  Design the Details

Fill in the outline you created in Step One with every detail you can think of to turn the dream into reality.  Let’s say your project is to repaint three bedrooms in your home, replace the flooring and the baseboards.  What must be done to make this happen?  Your list might include things like which room will be tackled first, moving out all the furniture, choosing paint and flooring brand, type and color, researching costs, purchasing the paint and painting supplies, possibly researching and hiring painters, installers and so on.  Note that we are still very much in the thinking and planning stages, not doing!

Step Three:  Gather Specific Information

Now you are going to do some of the things on the list you created in Step Two.  Research products, especially quality, sources and costs, online, in stores, and by talking to people who have had experience with the project you are planning (friends, neighbors, contractors, etc.)  Write everything down!  Now is also when you will make some decisions about who will do the actual work.  If you decide the project is beyond your skill or capability, you will need to research, talk to and get estimates from reliable contractors.  Does your project require special building permits or inspections, permission from your insurance company and the like?

Step Four:  Set a Budget

With all the information you’ve obtained from your research, a fairly accurate estimate of costs is now possible, and that may lead to some hard decisions.  Have you considered needs vs. wants?  How will you pay for the project; that is, do you have the money in the bank, or can you finance the project over a period of time?  Have you compared prices and talked at length with suppliers, contractors and the like to get the very best deal?  Write down in detail the estimated costs – and then build in a cushion of 10 to 25%!

Remember that your budget should also reflect the time the project will take to complete, and build in a realistic cushion here too.  Renovations are notoriously stressful because they do take time, and they do cause disruption in a household.  Now is the time to think everything through and consider exactly how you will cope.  By the way, be sure to contact your insurance company and let them in on your plans.

Step Five:  Get ‘er Done

The person who said “measure twice, cut once” knew that careful consideration and planning, working through every detail and eventuality, preparing for every possibility should result in a great conclusion to your renovation.  Organize your information and details into a systematic step by step format of what needs to be done, when and by whom, refining the lists you’ve been creating in all the previous steps.  Work from these lists and timelines, and check things off as things are completed.  Does this mean your project will be without hiccups?  Maybe not, but you’ll have far fewer of them if you’ve worked through the first four steps above as thoroughly and carefully as possible.

Step Six:  Evaluate the Results

The reno is complete and now all you have to do is sit back and enjoy the end product.  Right?  Not quite.  Make sure you add new items in your home to your home inventory.  Take photos or videos.  Let your insurance company know what’s new in your home.  Add the records, bills, warranties and so on to your home file for things such as home appraisals, taxes, resale purposes, etc.  And finally, pat yourself on the back for a job well done!

Ready to put your freshly renovated home on the market?  Call or text me at 780-910-9669, email me at barry@barryt.ca, or contact me here.

Should I Buy a Generator?

Wednesday, January 8th, 2014
Should I Buy a Generator? | Spruce Grove Stony Plain Parkland County Real Estate | Barry Twynam

CC Photo supplied by Falls Avenue Vintage Fashion

Residents of Spruce Grove, Stony Plain, Parkland County and the Edmonton area shuddered in horror during the last two weeks of December 2013 as ice storms in eastern Canada caused power outages that left people shivering in the dark, not for hours, but for days.  No power meant no heat, no lights, no way to keep food from spoiling, in many cases no water and no way to cook food.  Many of us started thinking about our own dependence on the electric power grid and what we could do if faced with such a disaster.

One solution might be a backup generator run by diesel, gasoline, propane or natural gas that could at least provide power to essential appliances such as furnace, refrigerator, stove or microwave, and the like.  What do you need to know before you purchase one and attempt to install it on your property?

What size do I need?

When it comes to generators, especially those that can run multiple appliances, bigger is better.  Experts suggest anything smaller than 4500 to 6000 watts just won’t get the job done.

First, determine what items you want to run.  Be aware that a generator is not intended to run every electrical appliance in your home and certainly not at the same time, so some choices will need to be made.  Most people would put things like the furnace, fridge, freezer and stove at the top of their lists.  Add your hot water tank if it is electric, and anything else that would cause undue hardship if you had to live without it for a few days.

You need to know how many watts of power are required to run your chosen items, but even more important is the “start-up wattage” – how much power is required when the item is turned on.  For example, a refrigerator might need 800 watts to run, but 2500 watts to start.  A good chart listing the wattages for selected home appliances is published by Plano Power Equipment.  Many appliances in your home should also have this information printed on them.

Add up the amount of wattage needed for all the items you want to run (don’t forget the lights!), and add 25% more to account for error and also to keep the generator running below its maximum capacity.

Remember too that most of these machines, like your vehicle or lawnmower, run on fuel in tanks that have to be re-filled!  Average continuous running time is about 5 to 7 hours.

How do I manage the power?

One thing to remember:  Turn something OFF before you turn something else ON!

A very good article called “Power On” published by GulfCoastNews.com has some great tips for choosing, operating and installing a portable generator.

The author of this article recommends turning on the refrigerator and freezer first, then a few lights and other low-wattage appliances.  Once everything in the freezer is frozen, unplugging it for a while won’t hurt the contents and you can then run other appliances and equipment.

So, can I just plug in the generator?

Uh, no.  What you’re going to need is a “transfer switch”.  The “Power On” article defines a transfer switch as “a manual three-position switching device that allows power to be channeled to the home’s electrical system either from the utility company power lines or from the generator – not both”.   Why is this important?  “Plugging a generator directly into a wall socket instead of utilizing a transfer switch sets up several potentially deadly scenarios: a short-circuit and electrical fire in the home’s wiring when power is restored; a system short-circuit in the generator causing it to catch fire or explode when power is restored; and the possible electrocution of linemen working to restore power in your area.”  Yikes!

Here’s a good idea, from the same article:  “If you are building a new home [or renovating], consider having the contractor install a sub-panel that is already set up for stand-by power. This saves you money because there’s usually no additional installation labor costs and the generator-ready panel eliminates the need for an additional transfer switch box.”

See also “Portable Generator Safety” from FortisAlberta.

How do I go about installing my portable or stand-by generator?

Take a look at this video called “How to Install a Stand-by Generator” from ThisOldHouse.com.  A little more complicated than buying the thing, bringing it home and turning it on, but chances are, if you ever have to deal with what the poor folks in eastern Canada did, you’ll be very glad you made the effort!

OK, I’m sold!  What do I buy and how much will it cost?

Home Depot has a good article on generators on their website, along with links to information on the generators they sell.     Check out also this page from ConsumerReports.org.   If you are a subscriber, you will be able to access the Consumer Reports ratings on generators.

Personal opinion?  If you’re going to do this, go for the best.  For example, Honda’s Premium series of generators (5000 to 6000 watts) cost in the range of $3000.  (View the spec sheets from Scona Cycle.)  Add in roughly another $750 for installing the transfer switch and incidentals and you will be good to go even if the Edmonton area gets hit with a 2-week-long power outage like Ontario’s.

Comments or questions about this article?  Call or text me at 780-910-9669, email me at barry@barryt.ca, or contact me here.

Shedding a Different Light

Friday, January 3rd, 2014

Shedding a Different Light | Spruce Grove Stony Plain Parkland County Real Estate | Barry TwynamHow many incandescent light bulbs are in your home in Spruce Grove, Stony Plain, Parkland County or the Edmonton area?  This isn’t an idle question, or the beginning of a dumb joke, although the ban on incandescent bulbs that went into effect in Canada on January 1, 2014 may seem like a bad joke to some.

In case you missed it, as of January 1, old-fashioned light bulbs in their 75- and 100-watt formats are history in Canada.  You can still buy them until the old stock runs out but no more will be manufactured.  By the end of 2014 the ban will be extended to include the 40- and 60-watt versions.

There are plenty of people who are unhappy about this.  They point out that the incandescent bulb provides a soft warm dimmable light that alternatives such as compact fluorescent lights (CFLs) and LEDs can’t match.  They also note that CFLs and especially LEDs are much more expensive to buy.  And CFLs, because they contain mercury, must be disposed of in special facilities, a fact that many people using them may not be aware of.  In addition, CFLs may not work in temperatures less than minus 10 degrees Celsius.  Their lifespan can be significantly reduced if they are turned on and off rapidly, and they have a rare but nasty habit of catching on fire or smoking.

So why the ban on incandescent bulbs?  It’s all about saving the environment.  “In Canada alone, the federal government estimates that CFLs can reduce greenhouse gas emissions by more than six million tonnes a year, or the equivalent of retiring 1.4 million vehicles. In Germany, the switch to energy-efficient bulbs will save the equivalent capacity of three nuclear reactors.”  (From an article in The Globe and Mail, Dec 27, 2012, entitled “The death of the incandescent light bulb”)

***Check out this great chart comparing the costs, energy efficiencies, environmental impact, advantages and disadvantages of incandescent bulbs vs. CFLs vs. LEDs. ***

More light facts:

  • Roughly 90% of the energy used to operate an incandescent bulb dissipates as heat rather than being used to provide light.  (Chicken farmers note that this is actually an advantage in the spring when they are raising baby chicks in a chilly chicken coop!)
  • The average life of an incandescent bulb is about 750 to 1000 hours, compared to 6,000 to 15,000 hours for a CFL (“Incandescent light bulb ban starts Jan. 1”)
  • Cost to buy:  incandescent bulbs 60 to 80 cents apiece; halogen bulbs around $2 each; CFLs $2.50 to $4; LEDs about $20 per bulb.  (The possibility exists that prices for the newer bulbs, especially LEDs, will decrease once incandescent bulbs are no longer being manufactured.)
  • Some incandescent bulbs will be exempt from the ban.  These include lights such as those in ovens and refrigerators that can’t be replaced with alternatives.
  • Manufacturers are working on improving the quality of the light in energy-efficient  bulbs.  “Light-emitting diodes, or LEDs, are the next big thing; global lighting company Osram Sylvania, for one, believes it has a winner with its “Ultra LED,” an omnidirectional mercury-free bulb that aims to give all the warmth of a 100-watt incandescent bulb while using just 20 watts of electricity.”  (“The death of the incandescent light bulb”, The Globe and Mail)

Maybe you’ve already made a trip to your local hardware store to buy up remaining stocks of incandescent bulbs, or maybe you’ve decided to give in to the inevitable.  At least we can still buy candles if we want soft warm light with a bit of heat!

What do you think of the ban on incandescent bulbs?  Have you already replaced all your bulbs with the energy-efficient ones?  Your comments and questions are always welcome.  Call or text me at 780-910-9669, email me at barry@barryt.ca, or contact me here.


Selling Your House in the Fall

Wednesday, September 11th, 2013

Selling Your House in the Fall | Spruce Grove Stony Plain Parkland County Real Estate | Barry TwynamFall time is beautiful in the Spruce Grove, Stony Plain, Parkland County and Edmonton region.  Late summer flowers are in full bloom, the leaves are turning orange, yellow and red, and the air smells crisp and clean.  There’s nothing quite like the bright blue sky and brilliant Alberta sunshine in the fall.  But having your home on the market as the days get shorter and the nights cooler comes with a certain set of challenges.

  • Those beautiful leaves don’t stay on the trees and as they fall, they can make your yard look unkempt and messy.  Small quantities of leaves can often be dealt with by using a mulching lawnmower or a leaf blower.  But if you have mature trees on your property, the best way to keep your yard looking good during the autumn months is to flex your muscles and rake the leaves.  This does more than make your yard look tidy.  Removing mats and debris from the lawn’s surface helps the lawn to “breathe” and sets it up for the winter months.  You’ll also want to clean up plants that have finished their summer life cycle:  cut back dead foliage, prune the raspberry canes and so on.  If you have plants in pots, bring them up onto your porch to provide a little color and curb appeal.  Or use some of that garden produce to arrange an artistic grouping of squash, pumpkins, ears of corn and the like.
  • As the light fades and the sun sinks lower in the sky, you need to let in as much natural light as possible.  Uncover your windows as completely as you can.  Open the curtains as wide as possible.  Pull up the blinds as high as they’ll go.  Vacuum accumulated dust, leaves and tree fuzz from window screens, and wash windows inside and out so they sparkle.
  • Light up your house for showings.  Turn on every light and lamp in your home, especially for late afternoon and evening showings, or on gloomy days.  The more light, the larger and more welcoming rooms will seem.  Consider buying a few inexpensive lamps to add to tables or corners, especially in rooms that have only overhead light fixtures.
  • Cozy it up.   There’s a reason professional home stagers use strategically placed and brightly colored throws plus mountains of pillows when they decorate a home!  In the fall, add even more appeal and warmth by choosing items with interesting textures that invite touch:  a big fluffy blanket draped over the couch, roughly textured pillows in an armchair, etc.
  • Fill your home with the scents of autumn.  You probably already know that the smell of your home is a strong influence on buyer interest or distaste.  Start with a super-clean house but also use the warm and comforting smells of autumn to hook in those buyers!  The aroma of freshly baked spicy cookies or apple pie can’t be beat.  If you can’t arrange that before a showing, here is a good alternative.  Boil water with cinnamon, cloves and orange peel for about half an hour sometime during the day of a showing.

Want more tips for selling your home?  I’m happy to help.  Please call or text me at 780-910-9669, email me at barry@barryt.ca, or contact me here.


Your Pet-Friendly Home

Friday, July 19th, 2013

Your Pet-Friendly Home | Spruce Grove Stony Plain Parkland County Real Estate | Barry TwynamIs there a dog or cat living in your Spruce Grove, Stony Plain, Parkland County or Edmonton area home?  According to a 2008 Ipsos-Reid survey as reported in the Canadian Veterinary Journal, roughly 56% of Canadian households have a dog or a cat as a pet.

Animals make their presence known in your home, and not in a good way, through scratches on walls, floors and furniture, stains on carpets, dander and allergens in the air, and various unsavory odors.  But there are ways to keep your house in good shape and all residents happy with a few smart and relatively inexpensive adjustments.  The most important advice is to choose the right materials and work with your animal’s natural instincts and needs.

Keep it clean!  Home and pet, that is.

  • First, vacuum often.  It’s a basic fact of life that dogs and cats shed.  Invest in a decent vacuum cleaner, preferably with HEPA filter, and plan on going over carpets and upholstery about twice a week or more.
  • Reduce the amount of clutter in your rooms.  Each object you remove from a room means one less object that gets covered in dust, dander and pet hair.
  • An item that is well worth the cost is a HEPA furnace filter which removes huge quantities of dust, dander and allergens from the air.
  • Use enzyme cleaners such as Nature’s Miracle Stain and Odour Remover when dealing with pet messes.
  • You might also want to purchase some special furniture covers designed with pets in mind.  (See these Pet Protector Covers available from Sears Canada).  Easier to wash these than to shampoo the furniture.
  • Keep your pet clean and well-groomed.  This means regular brushing, nail-clipping, bathing and the like.  If you can remove some of the hair and the oil and dirt it holds before it ends up on your floors and furniture, your house will be cleaner.  Trimmed nails are less likely to scratch floors or snag upholstery. 

It’s the nature of the beast!  Work with your pets’ natural inclinations to mold their behavior to what’s acceptable.  Your dog, for example, wants to please you so will tell you when he wants out and will also adapt readily to his own bed or crate.  Supply a clean litter box and a scratching post for your cat and watch her take to them.  If you find your animal jumping on the couch to look out the window, consider moving that couch away from the window and possibly installing a platform that bolts to the window sill to accommodate your pet’s preference.

Choose the right fabrics.  If you have pets, you already know to stay away from silk and velvet.  If you’re shopping for new furniture, consider something like Crypton or UltraSuede, which are wonderfully stain-resistant and durable.  Leather will scratch, but it is easy to clean and long-lasting.  Forget the dry-clean-only bedding and opt for washable everything because you know your pet will end up on your bed at some point.

Get rid of fabric altogether, where you can.  Replace draperies with wood blinds, for example.

Choose the right flooring.  Carpet and pets are a bad combination.  Carpet soaks up “accidents”, absorbs odors, and traps hair and dander – yuck!  If possible, consider replacing wall-to-wall carpeting in your home with any of the variety of hard-surface flooring on the market today, and bonus! these choices are very fashionable at the moment.  The best option for a pet-proof home is ceramic tile because it’s pretty much impervious to anything your pet can do!  Other easy to clean and durable alternatives include painted concrete, brick, high-end linoleum, or hardwood (but be aware that big dogs can scratch wood).

Neutrals work best.  Dramatic color schemes will show dirt, hair, and wear and tear more than colors such as gray, taupe and cream.  Luckily, neutrals are in style now for everything from paint on the walls to furniture, carpets and counter tops.  If you’re planning to re-paint, remember to choose a washable satin finish, and look for low or no-VOC (volatile organic compounds) paints.  Both you and your pet will benefit from not breathing toxic fumes.

Consider some of these specialty products and home renovations:

  • Disguised litter box, partially covered and resembling furniture.  Keep the odor down by placing in a well-ventilated area if you can, and by cleaning it frequently.  The litter box might even be located in a separate room, such as a garage or utility space, with access through a secret cat door hidden inside a cabinet.
  • Built-in bench with removable cover next to an outside door:  Provides convenient seating for people to put on and remove shoes, and the inside provides storage for pet toys, balls, leashes, etc.
  • Indoor pet retreat or special mudroom could be a corner or even a whole room located by an outside back door.  Automatic feeders and drinking fountains and even doggy showers are often features of these spaces.  Some have lockable exterior access doors designed for your pet to go inside and out.  Most have specialty storage for all pet-related items such as food, chew toys, towels, etc.
  • Heated floors.  Good for animals and people!
  • Cat ramps are a series of shelves resembling stairs running up a wall to just below the ceiling where they meet a longer shelf where cats can run or recline.
  • Portable pet stairs to help small animals access furniture.
  • A doggy overlook is a square opening on the second floor allowing your dog to stick his head through to keep watch on his owners below.
  • Outdoor dog and cat runs.
  • For more ideas like these, see my Pinterest board “Pets and Your Home”.

What special things do you do in your home to accommodate your pets while keeping your home clean and stylish?  I’d love to hear from you.  Call or text me at 780-910-9669, email me at barry@barryt.ca, or contact me here.
 

Barry Twynam, Century 21 Leading
#1 14 McLeod Avenue, Spruce Grove, Alberta, T7X 3X3
Tel: 780-910-9669 Cell: 780-910-9669 Fax: 780-962-9699
© Copyright 2011, Real Estate Websites by Redman Technologies Inc. | Privacy Policy | Sitemap
The data included on this website is deemed to be reliable, but is not guaranteed to be accurate by the REALTORS® Association of Edmonton
MLS® MLS REALTOR® Realtor
Trademarks used under license from CREA