Archive for the ‘Do It Yourself’ Category

Spring Cleaning

Thursday, April 6th, 2017

Tulips and daffodils are making themselves known, popping up out of the dirt, a sure sign that spring is here. It’s time to get your house looking and feeling clean, inside and out. Here is a checklist of things that need doing:

Outside:
• Put seasonal items away in storage (snow shovels, Christmas decorations, etc.)
• Pick up stray garbage
• Clean up after your pet
• Shake out entry mat
• Sweep the walks and deck/patio
• Rake the grass when it is dry
• Turn on hose bibs when the chance of freezing is over
• Put out hoses
• Power wash siding
• Wash windows and doors
• Clean outdoor light fixtures
• Clean outdoor furniture
• Trim trees, bushes, shrubs
• Prepare garden and flower beds for planting

Inside:
• Start at the top and work your way down
• Clean ceiling fans and light fixtures
• Dust ceiling corners
• Wash or dust walls and baseboards
• Clean air vents
• Wash windows
• Wipe all light switches and electrical plug covers and door knobs
• Dust all surfaces
• Clean all window coverings
• Polish furniture
• Clean floors
• Pull out appliances and clean underneath them

Winterizing Hose Bibs

Monday, December 5th, 2016

Here is the step by step directions for winterizing your hose bib correctly, to ensure no breakage or bursting when spring rolls around.
Step One: Take Off The Hose
You can’t winterize the hose bib with the hose attached to it still. No brainer right? Detach the hose from the hose bib and drain it completely. Frozen water in hoses can cause holes and leaks too, so to keep your hose over winter it needs to be properly drained. You can lay the hose down and walk the length of it, picking up small sections and letting the water flow out. Imagine a tube of toothpaste, and try not to miss any spots. Once it’s empty, roll it up and store it for the winter months.
Step Two: Drain the Faucet
This step is quite like the steps you take to winterize faucets in your home. You’ll locate the shut off valve for the outside water line (if you have any trouble here contact a plumber to help you locate it) and shut the water off. Once the water is disconnected go back outside and turn the faucet all the way on. This will drain out any water currently sitting in the line.
Step Three: Drain the Valve
Go back inside to where the shut off was, and locate a small brass looking plug or cap. Unplug that cap, so that the valve itself will drain. Draining the water out, without emptying the valve, is useless. You must do both. Once that valve and all the water in the line have been drained, you can close the valve and shut the hose bib faucet off.
You’re Done!
It’s a simple 10 minute job, but it can save you hundreds in plumbing repairs when spring thaws the frozen winter water.

The Pros and Cons of Property Flipping: Find Out If It Is For You

Friday, December 12th, 2014

The Pros and Cons of Property Flipping: Find out if It is for You | Spruce Grove Stony Plain Parkland County Real Estate | Barry TwynamIf you’re looking to complete a property flipping project in one of Alberta’s sought-after neighbourhoods like Spruce Grove, Stony Plain, Parkland County, or the Edmonton region, you’re in for a fun and rewarding experience. Just as it is a fun hobby to some or a means of added income for others, property flipping can also be a business or main source of income for many people who are well versed with real estate and renovations. There are a variety of reasons why you might want to flip a piece of Parkland County real estate or one of the many Edmonton acreages available for purchase. Before you start, though, it’s important that you understand what you’re getting into. If you’re looking to flip a piece of Edmonton real estate, consider these advantages and disadvantages before committing to the project.

Pro: Great Financial Gain

Of course, the number one advantage of property flipping is the financial gain that so many people achieve. Many people have amassed significant wealth with a simple property purchase, renovation, and sale at the right place and the right time. A major part of their success involved having a solid understanding of the trends in the real estate market. If you can buy and sell at the right time, you could earn a lot of money simply by flipping a property.

Con: Relatively High Risk

One major disadvantage when it comes to property flipping is the relatively high risk involved. In order to profit from a property flip, you will need to buy low, invest into the property, and sell high. This means leveraging changes in the market – knowing when prices will drop and when they will rise. Either buying or selling at the wrong time will greatly reduce your property’s value – and if you happen to both buy at a poor time and sell at a poor time, you could find that your newly renovated property is worth less than it was worth when you purchased it.

Pro: A Fun Project

Many property flippers who thoroughly enjoy the project have a keen sense of interior design or a good grasp of home renovations and improvement, or both. Having a passion for design and renovation will certainly help to make property flipping a fun and rewarding experience. This is especially true for home flippers who are able to undertake certain home renovation or decorating projects themselves, without having to involve too many contractors. First and foremost, your property flip should be a labour of love.

Con: A Big Mess

For those who don’t have an understanding of home renovations, especially for those hiring contractors for the first time, it is common to find yourself in a big mess – both literally and figuratively – when it comes to renovating the home in preparation for its sale. When dealing with contractors, it’s very common for things to run behind schedule or for fees to go well above what was initially quoted. A property flip is a major project with all sorts of intricate details, and there are a thousand different things that could go very, very wrong. If you’re not prepared to take that risk and deal with the fallout, you will neither enjoy nor profit from a house flip.

If you are interested in undertaking a project with a piece of Spruce Grove real estate, Stony Plain real estate, or Parkland County acreages, you can find immediate financial benefits as well as longer term financial gains in each of these areas. Most importantly, it’s crucial to understand your own qualifications and knowledge when it comes to property flipping, and to be able to assess your ability to deal with challenges that will arise when you flip a property.

For a better understanding of what’s involved in property flipping, I’m always happy to answer your questions. Feel free to call or text me at 780-910-9669, email me at barry@barryt.ca, or contact me here.

Smartphone Apps for DIYers 2.0

Friday, December 5th, 2014

Smartphone Apps for DIYers 2.0 | Spruce Grove Stony Plain Parkland County Real Estate | Barry TwynamWay back in June 2011 I posted a blog article about smartphone apps for do-it-yourself home owners in Spruce Grove, Stony Plain, Parkland County and the Edmonton region.  Three and a half years are a lifetime in tech terms but surprisingly, most of the apps I described in the article are not only still available but are even better than before.

Everybody who has a smartphone knows there are 1000s of apps out there for every possible topic. Where to find the best ones for DIYers? Start with LifeHacker’s article How to Make Your Smartphone the Most Important Tool in Your Toolbox. Then, take a look at these great articles that review the latest and greatest apps.

Home Improvement

Better Homes & Gardens: Don’t DIY Without These 9 Apps
Bob Vila: 5 Top Tool Apps for Your iPhone
Popular Mechanics: The 10 Best Apps for DIYers
Tom’s Guide: 10 Best Home Improvement and DIY Apps
Top 13 Best Android Apps for DIY Projects and Home Remodel Repair

Home Décor

Chatelaine: Six Must-have Smartphone Apps for Home Decorating and Renos
Huffington Post: 21 iPhone, iPad and Android Apps for Decorating, Home Repair, DIY and Crafts
Remodelista: The 12 Best Apps for Remodelers

Gardening and Landscaping

Best Android Apps for Gardening and Landscaping
Best Landscape Design Apps – iPad, iPhone & Android
The Dirt Farmer: 20 Smartphone Apps for the Plant Lover
NY Times: 20 Smartphone Apps for the Home and Garden
Top 5 Gardening and Landscaping iPhone Apps

Let me know what you think of these apps. Better yet, let me know if you find a great app that isn’t on any of these lists and I’ll happily share it with everybody else! Call or text me at 780-910-9669, email me at barry@barryt.ca, or contact me here.

The DIY Guide to Replacing Your Broken Bathroom Faucet in Just Six Easy Steps

Thursday, November 13th, 2014

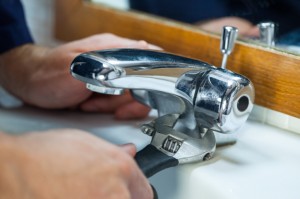
The DIY Guide to Replacing Your Broken Bathroom Faucet | Spruce Grove Stony Plain Parkland County Real Estate | Barry TwynamIf you own Parkland County real estate or a home in the Stony Plain, Spruce Grove or Edmonton area, you’re probably familiar with a whole host of around-the-house handyman strategies for completing minor repairs. One type of repair that many homeowners overlook is replacing a bathroom faucet. Bathroom faucets can and do break, and knowing how to replace a broken bathroom faucet can save you the time, effort and money it would take to hire a handyman for the job. Here’s how you can replace a broken bathroom faucet in six easy steps.

Step #1: Finding a Replacement

First, examine the sink. After removing the faucet attachment, you’ll see several openings. Look at the openings, and check to see how far apart they are. Bathroom faucets might have two handles that spread apart, or they might be a single unit. Knowing the configuration of your sink will enable you to select the correct replacement faucet.

When choosing a replacement faucet, it’s important to keep in mind that not all faucets are created equal. Faucets costing less than $100 are often made from chrome-plated plastic parts, and they have valves and seals that wear out quickly. These faucets might be able to withstand light usage, but they will not last over the long term. Faucets that cost $100 or more usually use a firm brass body. This kind of faucet is leak-resistant and does not break easily. A number of faucets come with lifetime warranties – opting for one such faucet is a great way to avoid further expenses down the road. A good sink replacement can add value to a Spruce Grove real estate property.

Step #2: Reviewing the Instructions

Every faucet has a unique set of instructions, and they range from highly detailed and useful to minimal and maddening. Read the instructions thoroughly, and ensure you have all the necessary tools and components to do the job. Make sure you review any and all diagrams and appendices to ensure you have a good mental picture of what it is you’ll be doing.

Step #3: Prepare the Workspace

Next, remove all the objects from under the sink. Fetch a portable lamp and shine it underneath the sink. Under the sink, you will see two supply lines that come out of the wall and reach up to the faucet. Turn off both these valves by twisting clockwise. Once the valves have been turned off, it is safe to loosen the tube nut and to lift the tubes out of the valves. Additionally, there will be one, two or three large nuts holding the faucet in place. Use a basin wrench to remove them.

Step #4: Lift the Old Faucet Up and Out

Lift the old faucet out of the sink, and examine the tubes to see if they have been damaged. If there is damage to the tubes, you will need to replace them. You can find plastic tubes, as well as end fittings and nuts, at your local hardware store. Ensure the new plastic tubes are the same length as the old ones.

Before installing the new faucet, be sure to clean the area. You can dissolve hard water deposits using an acid-based cleaner or vinegar.

Step #5: Installing the New Faucet

When installing the new faucet, check to see if the faucet base has a soft gasket. The soft gasket seals the base and prevents water seepage. If there is no such gasket, you can create one using plumber’s putty. Stick the putty around the base and start tightening the large nuts. Some of the plumber’s putty may squeeze out onto the faucet – if this occurs, you can remove it using rubbing alcohol

Step #6: Attaching New Tubes to the Faucet

Attach the new tubes to the faucet before installing the sink. Then assemble the new faucet and slip it through the hole in the sink. Then, simply tighten the nuts below the sink, and voila! Your Edmonton property has a beautiful new faucet. Before you use this new faucet, be sure to turn on the valves underneath the sink and ensure all the nuts are tight. Check for leaks when you run the water, and tighten connections as necessary.

***For even more help, see the YouTube video from RONA “How to Install or Replace a Bathroom Faucet“.

Repairing bathroom faucets and completing other repairs at your Stony Plain real estate properties or Parkland County acreages doesn’t have to be a challenge. With a little bit of knowledge and the right tools, you can carry out minor repairs throughout your home and feel confident in your ability to care for your property.

For more great information and to discover all that Edmonton real estate and Edmonton acreages have to offer, please get in touch with me today.  Call or text me at 780-910-9669, email me at barry@barryt.ca, or contact me here.

Looking for a Summer DIY Project? Building a Beautiful Wooden Fence in Seven Easy Steps

Monday, June 16th, 2014

Looking for a Summer DIY Project_ Building a Beautiful Wooden Fence in Seven Easy Steps | Spruce Grove Stony Plain Parkland County Real Estate | Barry Twynam


Looking for an easy and fun way to add some sweat equity to your home in Spruce Grove, Stony Plain, Parkland County and the Edmonton region? Building a wooden fence is a great way to add beauty and value to any home. Here’s your DIY guide to building a wooden fence for your yard in seven easy steps.

Decide What Type of Wooden Fence You Want

There are many types of wooden fences to choose from, and each requires different building methods. The best way to make your decision is to focus on what the main purpose of your fence will be. If you simply want to add some character to your property, a white picket fence might be just the ticket, but if you’re concerned about keeping out street noise or keeping a large dog in your yard, you’ll want to consider building something much taller.

Make Sure Your Fence Complies With Local Bylaws

Before you start building your fence, it’s important to ensure that your fence complies with local government regulations. If you build a fence that’s declared illegal by the local government, your fence could be torn down. Many municipalities require that you apply for a permit before building anything along your property line. It’s also important to check with the local authorities to make sure you won’t be coming into contact with any water, gas, or electrical lines when you dig your post holes.

Find the Right Materials

Your choice of fence style should help you determine which materials you’ll want to use. Be sure to pick something strong as well as stylish, as you’ll want to ensure that your fence is able to stand up to just about anything Mother Nature can throw at it.

Find and Mark Your Corners and Support Posts

When it comes time to build your fence, the first thing to do is mark where your corner and middle posts will be. Stake your corners and use a square level to make sure your corners are 90 degrees. Then tie strings between your stakes and measure out where your support posts will be. Generally you’ll want your support posts to be 8 inches or less apart. Measure so that you have an equal distance between each support post and each corner post if possible.

Dig Your Post Holes and Secure Your Posts

Once you’ve got your post positions marked you can start digging. You’ll want to bury at least one third of the length of each post underground, so you’ll need some fairly deep holes. Use instant concrete to hold your posts in place, and cover the remainder of the hole with dirt once the concrete has dried.

Build Your Fence Frame

Now you can attach horizontal support rails to your fence between each post. These are typically constructed using 2x4s. Depending on the size of your fence, you’ll probably want at least two or three support rails per section.

Add and Treat Your Privacy Boards

The final step is to add your vertical wooden strips or “privacy boards.” These boards are what will give your fence its final look. Choose a style that suits your property and pick a colour or stain that you think will complement the look of the fence.

There you have it! A brand new fence in seven simple steps. Of course you’ll want to do some careful measuring and planning before getting too carried away, and you might want to talk to a builder or property expert if you’ve never built a fence before.

If you’re wondering about what type of fence would best enhance the value of your property, or if you’d like to know anything else about Spruce Grove real estate, Stony Plain real estate, Parkland County real estate, Edmonton real estate, Parkland County acreages, or Edmonton acreages, I’d be happy to answer any questions you might have. Call or text me at 780-910-9669, email me at barry@barryt.ca, or contact me here.

Plan Ahead for Spring With the Lazy Person’s Guide to Building Your Own Deck

Wednesday, March 12th, 2014

Plan Ahead for Spring With the Lazy Person's Guide to Building Your Own Deck | Spruce Grove Stony Plain Parkland County Real Estate | Barry TwynamSo, you’ve just moved into your new home in Spruce Grove, Stony Plain, Parkland County or the Edmonton region and you’ve decided the best way to enjoy all of that lush scenery is to build a new deck. In fact, you’ve decided to build the deck yourself. This might seem like a lot of hard work at first, but building your own deck can be a pretty simple job with the right plan of action.

Pick a Design

The amount of work you’ll need to do all depends on the style of deck you want. If you’re strapped for ideas or you’re having trouble trying to visualize your dream deck, try using the deck plans simulator at deckplans.com. Once you’ve settled on a design, you’ll need to figure out what size the deck will be. If your deck is free standing, you’ll have complete flexibility when it comes to the shape and size. If you plan on building a deck that sits against your house, you’ll have to be aware of wall lengths, shrubbery, and other obstacles the might limit the space available for the deck.

Order Your Materials

The best part about using a deck plans simulator is that most will assemble a materials list for you, but be sure to order extra parts just in case. Here’s a brief overview of those materials:

– 2×6 planks treated lumber

– 4×4 or 4×6 treated lumber

– deck screws

– joist hangers

– block piers or concrete and pier tubes

– J bolts or anchor bolts

– mason’s string

– carriage bolts

You’ll also need to pick up a few tools:

– water level

– measuring tape

– circular saw

– sand paper

– hammer

– shovel

– safety clothing (goggles, gloves, etc.)

– hammer drill (you might not need this depending on what bolt system you use for the posts)

Building a Deck: The Basics

Step 1: Lay out the frame for the deck with string and put down markers for where the support posts will go.

Step 2: Dig holes for the concrete piers. Keep in mind the desired height of your deck.

Step 3: Pour your concrete for the piers if you’re making your own, and place the J-bolts in the centre of each. Leave them to dry. If you’re using block piers, place the blocks and prep each for an anchor bolt with the hammer drill.

Step 4: Place the piers. Use a level throughout the process to make you don’t end up with a wonky deck.  Secure your posts to the piers and make sure they sit at the right height.

Step 5: Use carriage bolts and lumber to build the border. Place joists along the flat side of the lumber to secure the support planks that run underneath the floor planks.

Step 6: Lay down the floorboards by hammering them into the support planks.

Step 7: Use sand paper to smooth down any chips or split wood. You’ll also need to go over any areas you sand down with a deck sealant for waterproofing.

Building your own deck doesn’t have to be hard. A basic deck can be built in as little time as a few afternoons. A deck can be a beautiful addition that raises the value of Spruce Grove real estate, Stony Plain real estate, Parkland County real estate, or Edmonton real estate. Homes in Parkland County acreages and Edmonton acreages offer a spectacular view, so why not enjoy it on your very own deck?

P.S.  Before you do any of the above, check with the local municipality about whether you’ll need a building permit for your deck!

Have questions about owning a home in these areas? Call or text me at 780-910-9669, email me at barry@barryt.ca, or contact me here.
Do You Know How (and When) to Inspect Your Own Roof?

Monday, March 3rd, 2014

Do You Know How (and When) to Inspect Your Own Roof? | Spruce Grove Stony Plain Parkland County Real Estate | Barry TwynamIf you own your own home in Parkland County, Stony Plain, Spruce Grove, or the Edmonton region, it’s to your benefit to know how and when to inspect your own roof. Whether your Spruce Grove real estate property is new or old, inspecting your own roof can save you money and extend the life of the roof. Your Stony Plain real estate agent would surely agree that it’s easier than ever for homeowners to inspect their own roofs. Here is how you can find out how and when to inspect your own roof if you own some Parkland County real estate.

Tips on How to Inspect Your Own Roof

Inspecting your own roof involves so much more than just climbing up there and glancing around. Inspecting your roof depends on checking out specific issues. For starters, inspect the flashings on the roof; these are metal pieces that cover the roof plane’s interruptions. It’s best to fix damaged flashings immediately, since snow can get into the interior. If the roof has wood shingles, check for indications of dry rot. If one-third of your shingles have dry rot, it’s time to replace the entire roof! If your Edmonton acreage’s roof is high-end and has clay or asbestos shingles, then you can inspect them without having to get on the roof. Just stay on the ground, use binoculars, and look for signs of chipping and missing pieces.

Tips on Easy Fixes for Roof Problems

If the problem with your roof is relatively simple, you can handle it yourself on your own Edmonton real estate property. For instance, loose shingles can be easily repaired by simply hammering in the popped nails. You can even replace both caulk flashing and shingles. $24 or so will get you a bundle of shingles, while roofing caulk costs around $6. You should set aside half a day for work on the roof. If repairs are more complicated, you’ll need to get in touch with professional roof repair companies.

Tips on When to Inspect Your Roof

Parkland County acreages boast some nice properties, and, sometimes, roof inspections should be done more frequently than just once a year. The rule of thumb is yearly or twice a year, but if there have been extreme weather situations (such as snowstorms or wind storms), you should check the roof more frequently. It’s recommended that a homeowner checks his roof after every severe snow or windstorm. Checking your roof more frequently can lead to spotting damage earlier, which makes it less costly to fix.

Now you know exactly how and when to inspect your own roof. It is not necessary to have someone do the job for you if you’re a homeowner. Inspecting your roof really has a lot to do with being proactive, and this can and will save you money in the long run.

I am always available to answer any roof-related questions you may think of. Call or text me at 780-910-9669, email me at barry@barryt.ca, or contact me here.
Plumbing First Aid

Monday, August 19th, 2013

 | Spruce Grove Stony Plain Parkland County Real Estate | Barry TwynamPlumbing First AidIt’s 2 AM in your Spruce Grove, Stony Plain, Parkland County or Edmonton area home, and some sense of foreboding has you heading down the basement stairs.  You explore the basement, wondering what could have awakened you.  Suddenly…  Uh, oh.  Your bare foot encounters a puddle of water that has no business being there, and you realize in horror that your hot water tank has sprung a major leak.  Would you know what to do?

Knowing  how to turn off the water heater ranks Number 2 on the list of the “Top 5 DIY Plumbing Fixes Every Homeowner Should Know”, from Today’s Homeowner.com, right after knowing how to turn off the water to your whole house and to individual plumbing fixtures.

Plumbing emergencies happen, often at inconvenient times, and they almost always need attention long before a plumber can arrive on the scene.  There are also situations that call for minor repairs, ones which any homeowner should be able to undertake on his or her own.   The article contains detailed information for dealing with each of the following:

Plumbing Fix #1:  How to shut off the water (includes turning off all the water in your house and turning off water at plumbing fixtures)

Plumbing Fix #2:  How to turn off a water heater

Plumbing Fix #3:  How to fix a leaky pipe (includes repairing a leak with epoxy putty and repairing a leak with a pipe repair clamp)

Plumbing Fix #4:  How to stop a toilet from running (includes how to adjust the water level in the toilet tank and how to replace a toilet tank flapper)

Plumbing Fix #5:  How to fix a dripping faucet (includes how to replace a washer on a leaking compression faucet and how to repair leaking cartridge or ball faucets)

Top 5 DIY Plumbing Fixes Every Homeowner Should Know” won’t make you a master plumber but this article just might save you a little money and hassle!  Worth a read.

I welcome your comments and questions on any topic related to the home!  Call or text me at 780-910-9669, email me at barry@barryt.ca, or contact me here.
DIY TV

Thursday, September 29th, 2011

DIY TV | Spruce Grove Stony Plain Parkland County Real Estate | Barry TwynamWhere do you go to get information for renovation projects?  The television set in your home in Spruce Grove, Stony Plain, Parkland County and the Edmonton area is probably not your first choice, but flipping through the channels these days reveals something surprising:  Among the many sports, movie and mainstream networks, there are a large number of worthwhile programs and even whole networks offering valuable information to homeowners.  Check out some of these offered in the Spruce Grove/Stony Plain/Edmonton area by Shaw Cable and TELUS Optik TV.  A little disclosure:  After you’ve checked them out, let me know what you think because I admit I haven’t seen most of them myself!

A & E

(Shaw 25, HD 233; Telus 170, HD 670)

$100 Makeover, Disaster Guy, Drill Team, Fix This Kitchen, Fix This Yard, Flipping Vegas, Flip This House, Hoarders, Sell This House

CBC  (Click on Find a Program)

(Shaw 4, HD 209; Telus 4, HD 618)

All for One With Debbie Travis, Steven and Chris

Discovery Channel  

(Shaw 32; Telus 200)

Canada’s Worst Handyman

DIY Network  (Click on Shows A-Z)

(Shaw 136; Telus 144)

A whole network of house-related programming, such as:  Decked Out, The Dirt on Gardening, Disaster DIY, DIY Hot List Kitchens & Baths, Dream House, Garage Mahal, Holmes on Homes, House Crashers, I Hate My Kitchen, Man Caves, Rehab Addict, Turf War, Wasted Spaces, Weekend Handyman, Yard Crashers, and many, many more.

HGTV 

(Shaw 19, HD 231; Telus 142, HD 680)

Too many shows to list them all here!  A few of the more popular:  Colin & Justin’s Home Heist, Debbie Travis’ Painted House, Gardening by the Yard, Holmes on Homes, Holmes Inspection, House Hunters, Property Virgins, Real Renos, Sarah’s House.  Many more.

OWN (Oprah Winfrey Network)

(Shaw 92; Telus 202, HD 651)

Divine Design, Home Takeover with Simon & Tomas

PBS

(PBS Spokane on Shaw 22, HD 204; Telus 23, HD 607 Seattle

PBS Detroit on Shaw 81

PBS Boston on Telus 54, HD 629)

HandyMa’am with Beverly DeJulio, The Perennial Gardener with Karen Strohbeen, The Router Workshop, This Old House, The Woodwright’s Shop

Slice  (Click on Shows)

(Shaw 33; Telus 141)

Family Renovation, House Poor, Shotgun Reno, Till Debt Do Us Part

TLC The Learning Channel

(Shaw 35, HD 236; Telus 140, HD 671)

Hoarding: Buried Alive, Home Made Simple, Kitchen Boss, Spouse vs. House

W Network

(Shaw 34; Telus 146)

The Agents, All for Nothing, Anna & Kristina’s Grocery Bag, Building Bryks, Candice Tells All, Colour Confidential, Divine Design, Grin and Build It, Help My House is Falling Down, Home Wreckers, Inside the Box, Love It Or List It, Making House, Million Dollar Decorators, My House Your Money, Property Brothers, Take This House and Sell It

Not strictly related to houses and real estate but still very much related to home, so we have to give an Honorable Mention to:

The Food Network 

(Shaw 29; Telus 143)

Ace of Cakes, Barefoot Contessa, Chef at Home, Eat Shrink and Be Merry, Family Restaurant, French Food at Home, Iron Chef America, Jamie’s Meals in Minutes, Restaurant Makeover, The Best Thing I Ever Ate, Tough Cookies, and much more!

This list isn’t intended to be comprehensive, but if I’ve missed anything that really should be on it, please let me know!

I’d love to help you find a house to turn into a home.  Call me at 780-910-9669, email me at barry@barryt.ca, or contact me here


Barry Twynam, Century 21 Leading
#1 14 McLeod Avenue, Spruce Grove, Alberta, T7X 3X3
Tel: 780-910-9669 Cell: 780-910-9669 Fax: 780-962-9699
© Copyright 2011, Real Estate Websites by Redman Technologies Inc. | Privacy Policy | Sitemap
The data included on this website is deemed to be reliable, but is not guaranteed to be accurate by the REALTORS® Association of Edmonton
MLS® MLS REALTOR® Realtor
Trademarks used under license from CREA